
Thumbnails on YouTube are like the covers of books. Even though the saying goes, "Don't judge a book by its cover," the truth is that viewers are absolutely judging content based on thumbnails.
This is important to understand if your goal is to get more views and subscribers on YouTube. More clicks equals more views, and more views equals the possibility of converting viewers into subscribers.
Tip
For the best results, you want your thumbnails to be the right size and you want to use a thumbnail maker with loads of photos, templates, and tools. This article will give you the resources to do all of that and more.
If a thumbnail doesn't entice a viewer in one way or another, then they will likely pass over that video for another of the millions of videos available to watch on YouTube. So YouTubers need to be doing everything you can to grab viewers' attention since the competition on YouTube for views is incredibly high these days.
This article is your one-stop resource for all thumbnail-related content. If you read and follow the tips in this article, you'll be a step ahead of other YouTubers who leave the thumbnail as an afterthought.
How to Create Better Thumbnails for Getting Views on YouTube :
1. The Difference a Thumbnail Makes
The best way to learn is by seeing it for yourself. Below we're showing you two examples of thumbnails by beauty and lifestyle YouTuber Zoella (Zoe Sugg).
Although their differences may jump out at you right away, let's take a deeper look to compare and contrast why we prefer one thumbnail over the other.
Understanding what to do and what to avoid will help you make more effective thumbnails. Afterall, you don't want to spend hours on a video only to have potential viewers turn away because the thumbnail didn't catch their eye.
Example 1
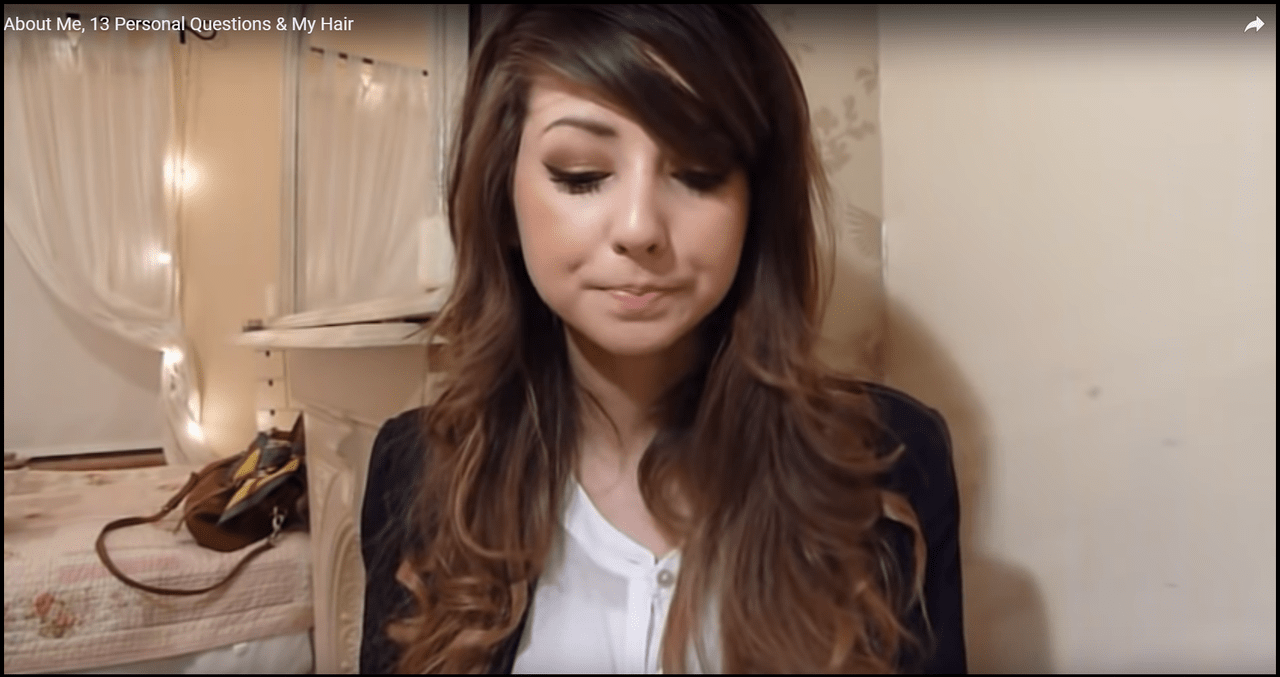
This thumbnail is from one of Zoe's earliest videos back in 2011. Obviously her channel has grown quite a bit since then and her approach to thumbnails has changed a great deal. Below we've listed all the reasons why this thumbnail isn't very clickable, and then in the next example we'll show you how Zoe has improved!
- No eye contact
- Dark image, little color
- No text, no description
Example 2
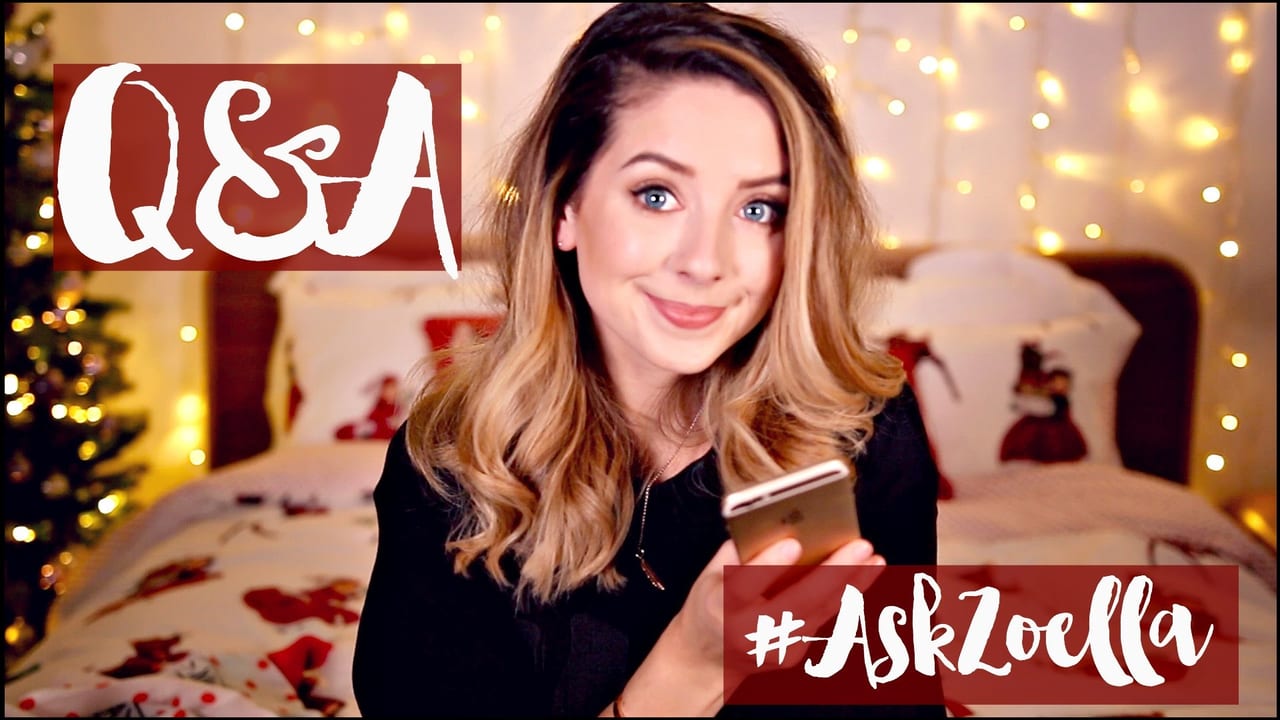
This thumbnail is a shining example of great design. Zoe has done an excellent job at attracting viewers' attention and we definitely would click on this thumbnail. See what makes this thumbnail such a success below.
- Eye contact: Humans are naturally attracted to eye contact and in this image, Zoe is looking directly at the viewer. It's best to have some kind of human element in your thumbnails. Usually, this means you will use an image of yourself, facing the camera, and making eye contact. Be sure the image is clear and bright.
- Bright image, full of color: The thumbnail is brightened and color corrected so that there is a clear color scheme. The picture of Zoe also is filtered to match the background image. Everything works together perfectly to give the feeling of unity.
- Informative text: Zoe does two things right with the text on her thumbnail. First, she tells the viewer exactly what the video will be about without putting too much text over the image. Second, she uses transparent boxes behind her text to make it easy to read. Never put text on a thumbnail that is difficult to read - it's a huge turn off to viewers!
2. Thumbnail Design Points
There are three points you'll want to be sure you understand ahead of time in order to design the best possible thumbnails. If you read the below points, you'll be miles ahead of the average user with no design experience. We've gathered all the most important points for you to have in one place, so keep reading to prepare yourself to be a savvy designer!
Point 1: Tools
We suggest using one of the design tools listed below to make your thumbnail. Each tool has some advantages and disadvantages, so try out a few and see which one you're comfortable with. There are thumbnail design tools for both the PC and mobile users, and we recommend using one of each so you have options.
*Note: The design apps are incredibly helpful for YouTubers who are constantly on-the-go since you can edit a thumbnail right on your smartphone. It's best to have at least one design app downloaded to your phone in case you need to edit in a hurry.
Point 2: Dimensions
Getting the dimensions right for your thumbnail is important so that your final image comes out perfectly clear. Nothing is worse than putting a lot of time and effort into a thumbnail only to find it becomes distorted on YouTube when you upload it. The YouTube thumbnail size you want to be using is 1280 x 720 pixels. So, 1280 pixels is the width and 720 pixels is the height. Keep in mind that the ideal ratio for a thumbnail is a 16:9 aspect ratio.
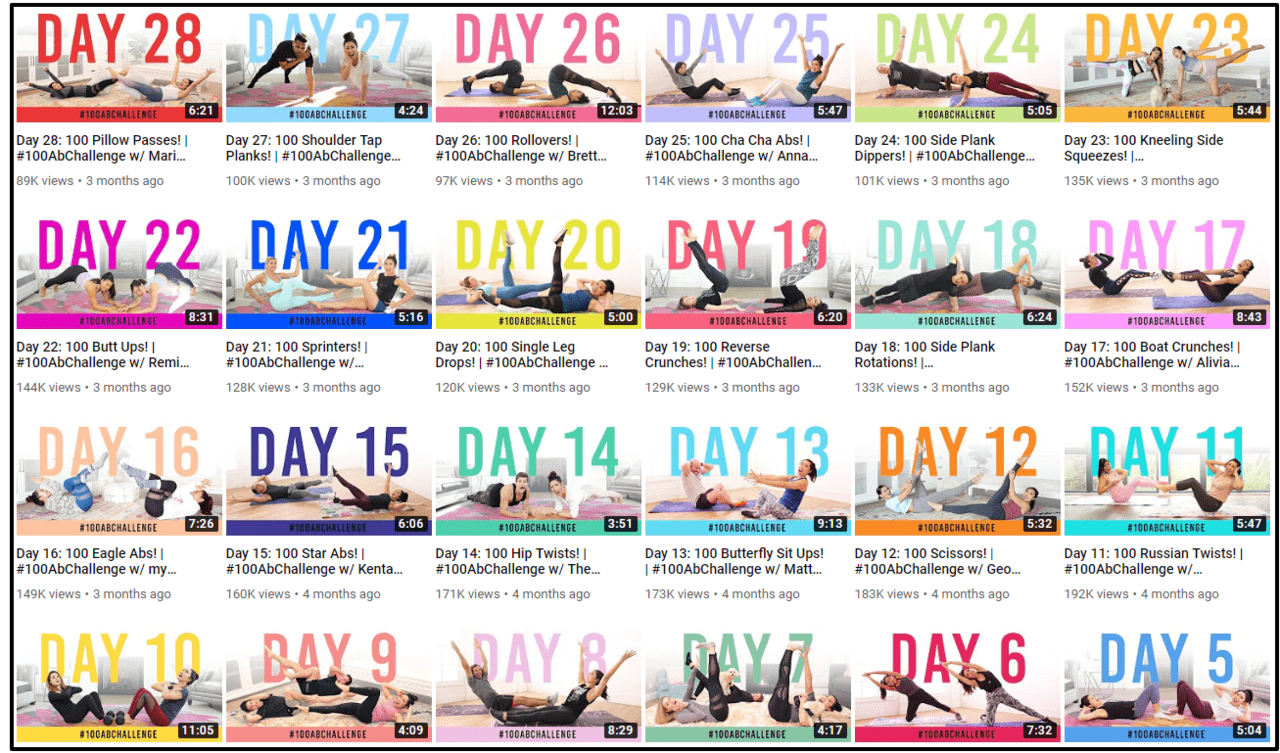
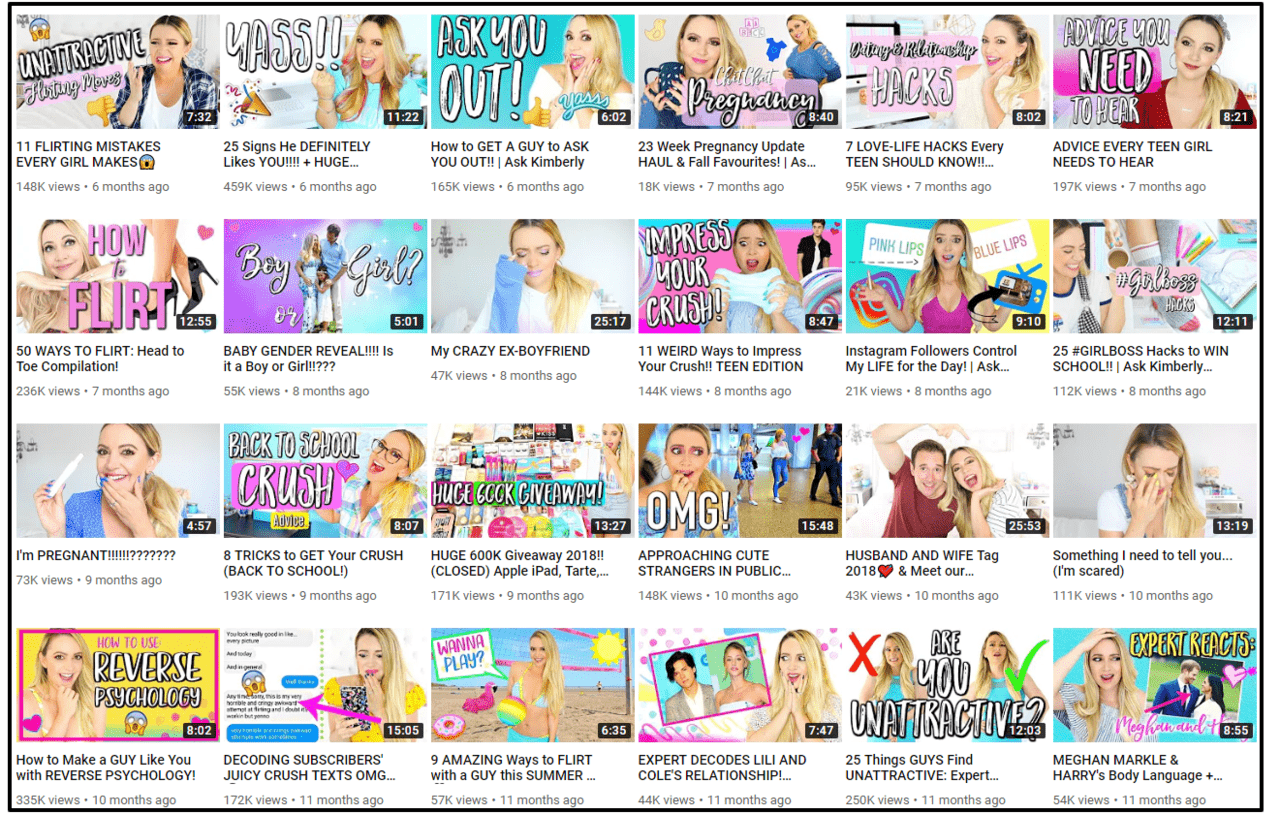
Point 3: Consistency
If you take a look at almost any top YouTuber's video page, you'll notice something special about their thumbnails: the consistency. Using the same style of font and design across all thumbnails is important for creating your brand image. When viewers take a look at your video page, you want them to get an idea of your video style and brand with just a quick glance.
Think carefully about your brand image before settling on the font and design you'll use for your thumbnails. See some cohesive thumbnail themes below from top YouTubers as an example of good design.
Blogilates Channel Thumbnails
Ask Kimberly Channel Thumbnails
Dee Nimmin Channel Thumbnails
3. Thumbnail Tools - PC
(1) Canva
You know Canva is a good option when it's specifically recommended by YouTube. That's right - the YouTube Creators Academy suggests Canva as a reliable design tool for YouTubers, so of course we had to mention it here. Canva offers over 2 million images to play around with, not to mention all the background and font options which number in the hundreds. There's plenty of content on Canva to satisfy all your design needs.
Canva Template Examples
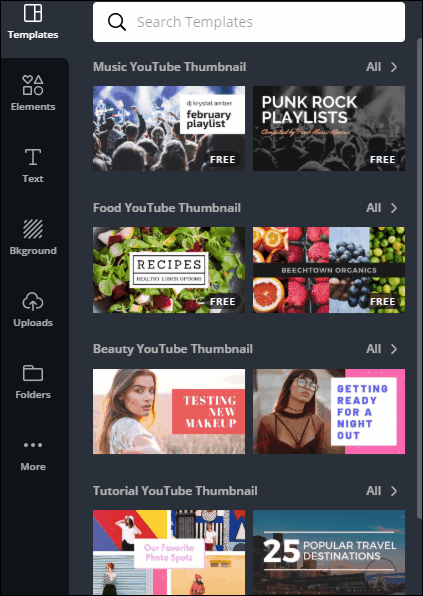
With Canva you can choose from a huge mix of thumbnail templates with various text and graphic elements that are easy to manipulate. Canva works well for all types of designers from complete beginner to advanced. This is because you the design process can be incredibly easy or more complex, depending on the user. Beginners can simply swap out the text in a template for their video title and call it a day - you'll still end up with a great-looking thumbnail. More advanced users have the option to replace the background, edit images, and more! There's truly something for everyone with Canva.
What we love about Canva
The guidelines make it super easy to line up elements such as text and photos. Everything in the template can be customized so you can create a truly unique thumbnail even if you start from a template.
Video tutorial
The video below gives a nice introduction to using Canva for thumbnail design, so we suggest taking a few minutes to watch and see if Canva is the right tool for you!
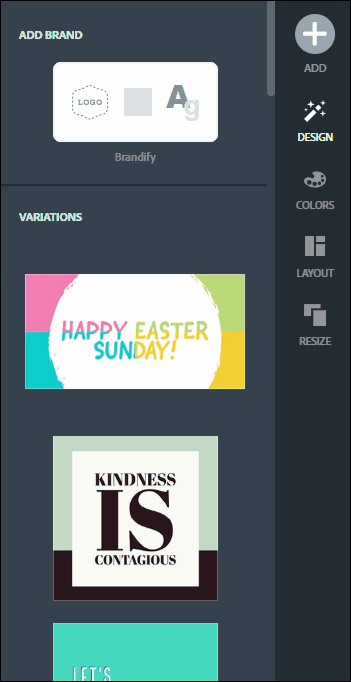
(2) Picmaker
Picmaker sets itself apart from the crowd by being a design tool exclusively made for YouTubers. Other design tools cater to many forms of social media, but Picmaker's tools were solely made for creating YouTube channel art and thumbnails.
Picmaker Template Examples
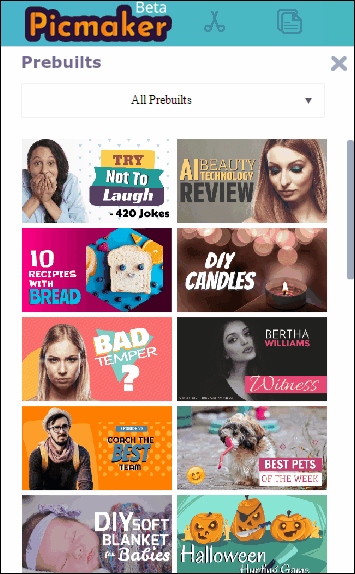
Picmaker has hundreds of pre-made thumbnail templates to choose from. Even though it's free to use, the quality of the templates and graphic elements look professional. You can make seriously polished thumbnails using only Picmaker - there's no need for any other software because Picmaker can do it all.
What we love about Picmaker
It can even remove the background from an image automatically. This way you can take your photo and paste it over various backgrounds. It takes a matter of seconds and the program is pretty good at identifying the image to cut out.
Video tutorial
See the below tutorial video for an in-depth look at how to make a beautiful thumbnail with Picmaker!
(3) Adobe Spark
Adobe Spark has a fair selection of templates to satisfy most users and their Inspiration Gallery is great for those who aren't sure what they want to design. You can create thumbnails on Adobe Spark with exactly the right dimension for uploading to YouTube - this takes a lot of worry out of the design process.
Spark Template Examples
Adobe Spark claims to give the designer complete freedom over their design. And with the option to view what other designers have created, the opportunities for inspiration are endless. Spark truly stands out as a design tool for beginners since you can gain all your creative inspiration directly from Spark without needing to have any kind of design knowledge or concept.
The only downside is that it would possibly come across as overly simplified to more advanced designers.
What we love about Adobe Spark
Spark streamlines the design process using a Flash player, so everything flows very well from one step to the next. Spark starts off by asking you to choose or upload an image for your design. This is a much less intimidating way to introduce the tool to users. And once you've chosen your thumbnail image, the tool swiftly moves you along to the next step of adding text or graphic elements.
Basically, Spark is incredibly user-friendly and perfect for complete beginners to design.
Video tutorial
The video below gives you a quick introduction to creating a thumbnail using Adobe Spark. Have a look and learn about Spark's practical tools and see how quick it is to make a totally customized thumbnail!
4. Thumbnail Tools - Apps
(1) PicMonkey App
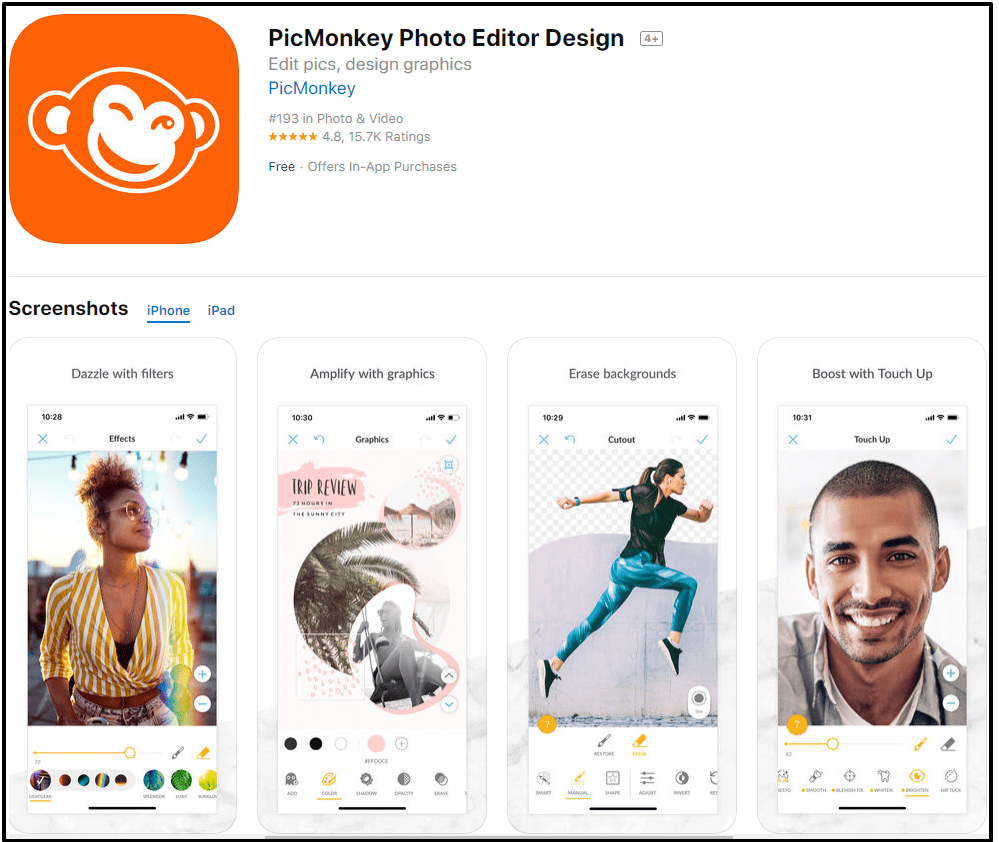
The PicMonkey app is a favorite among YouTubers who want a super simple tool for thumbnail design. It is the easiest to use in this list. You can make a background and add text over images using a canvas size of your choice. The app has a large number of fonts to choose from, too. Another big plus is the ability to remove the background from images. This is a common technique used in making thumbnails so it's great that PicMonkey has this option.
With PicMonkey, you can simply open the app and get right to work - there's no hassle with a complex collection of editing tools. The interface is extremely simple, but you'll be able to improve the quality of your photos greatly. PicMonkey also has a strong focus on branding, so the images and tools are geared toward creating an overall brand image which is a smart approach to thumbnail creation.
Video tutorial
This video is great if you want a crash course on the various functions of the PicMonkey app. It's super easy to follow along with the video, so we recommend downloading the app before watching the video!
(2) Snapseed App

Winning the award for the most versatile photo editing app in this list, Snapseed is a great choice for YouTubers who want an app that has editing power similar to what you'd find on PC. With 29 tools and filters, Snapseed gives you enough editing options to ensure you can achieve whatever type of design you've set your sights on. The app boasts about its precision, offering careful control over small adjustments.
If you're the type that really cares about the fine details when photo editing, then try Snapseed when you make your next thumbnail. It's complex enough to satisfy advanced users, but intuitive to the point that beginners won't be frustrated when starting out with the app.
Video tutorial
The above video will teach you how to make your very own thumbnail is mere minutes with Snapseed. It's really useful if you're new to the app - so have a look!
(3) PixelLab App
Last but not least, the PixelLab app takes the cake for all-in-one editing. You can customize the image size to have that important 16:9 aspect ratio, so you can design the entire thumbnail directly in the app including photo editing and adding text.
If you are the type of person who really wants a lot of control over your font design, then PixelLab is the app for you. They have loads of font editing options beyond the standard font selection, including opacity, texture, curvature and spacing to name a few. Have fun playing around with the font options in this app and create something uniquely 'you'!
Video tutorial
Check out the video above before you start having fun using PixelLab. The instructor will teach you everything you need to know about choosing an image size and photo along with adding text to your thumbnail.
5. Secrets to Making Better Thumbnails
Secret 1
Don't make the font and image in your thumbnail compete with one another.
It's a common misconception that the image of the thumbnail should stand front-and-center, dominating the overall appearance of the thumbnail. This is actually a mistake. Another mistake would be using a very bold font and photo together to the point that it overwhelms the eye. You want the text and photo to go together like a set, not battle to share the screen. Take a look at some successfully balanced thumbnails below to see what text and image harmony looks like in practice.

Secret 2
If you use an image of a person, make it a close-up shot.
We already learning previously the importance of eye contact in a thumbnail, so here's a little extra secret to make your thumbnail even more eye-catching: Make sure to zoom in on the face.
Zooming in on the face will increase the impact of the eye contact. It will also make your image appear more clearly for mobile users who have smaller screens.
Did you know...
According to Comscore, 70 percent of users view YouTube with a mobile device. And this number has possibly grown since the study was conducted in 2017.
It's clearly important to optimize your thumbnails for smartphone users, and zooming in on photos is the best thing you can do to improve your chances of getting more views, especially from all those smartphone users.
Secret 3
The first minute of your video should be represented by the thumbnail.
If there's one word you never want to see in your comment section, it's "clickbait". This is exactly what people may claim if you make a thumbnail that's either (a) unrelated to the actual video content or (b) represents a small or later portion of the video. You want your thumbnail to represent an early portion (think within the first minute) of your video.
So if your thumbnail is announcing "I'm Moving!", then you should mention the move right away at the beginning of the video. Otherwise viewers may fast-forward, or worse, click away from the video feeling cheated.
6. What We Learned

This article has taught you some of the absolute best practices in thumbnail creation. If you can master thumbnail design, we assure you that your content will become more clickable - and with this will come more views and subscribers.
We learned about the best tools, both for PC and mobile users, and you simply need to try them out to find your favorite. Once you've had some practice with the design tool of your choice, editing thumbnails will be a breeze.
If you want to know about some other ways to get more views and subscribers, check out some similar articles below!